

WebdriverIO
Welcome!
This guide connects your WebdriverIO tests to Testomat.io. By the end of this guide you will have:
- your WebdriverIO tests imported into Testomat.io
- test IDs synced between your code and your project
- run reports with screenshots and artifacts attached
- parallel runs reporting into a single run
Import your tests
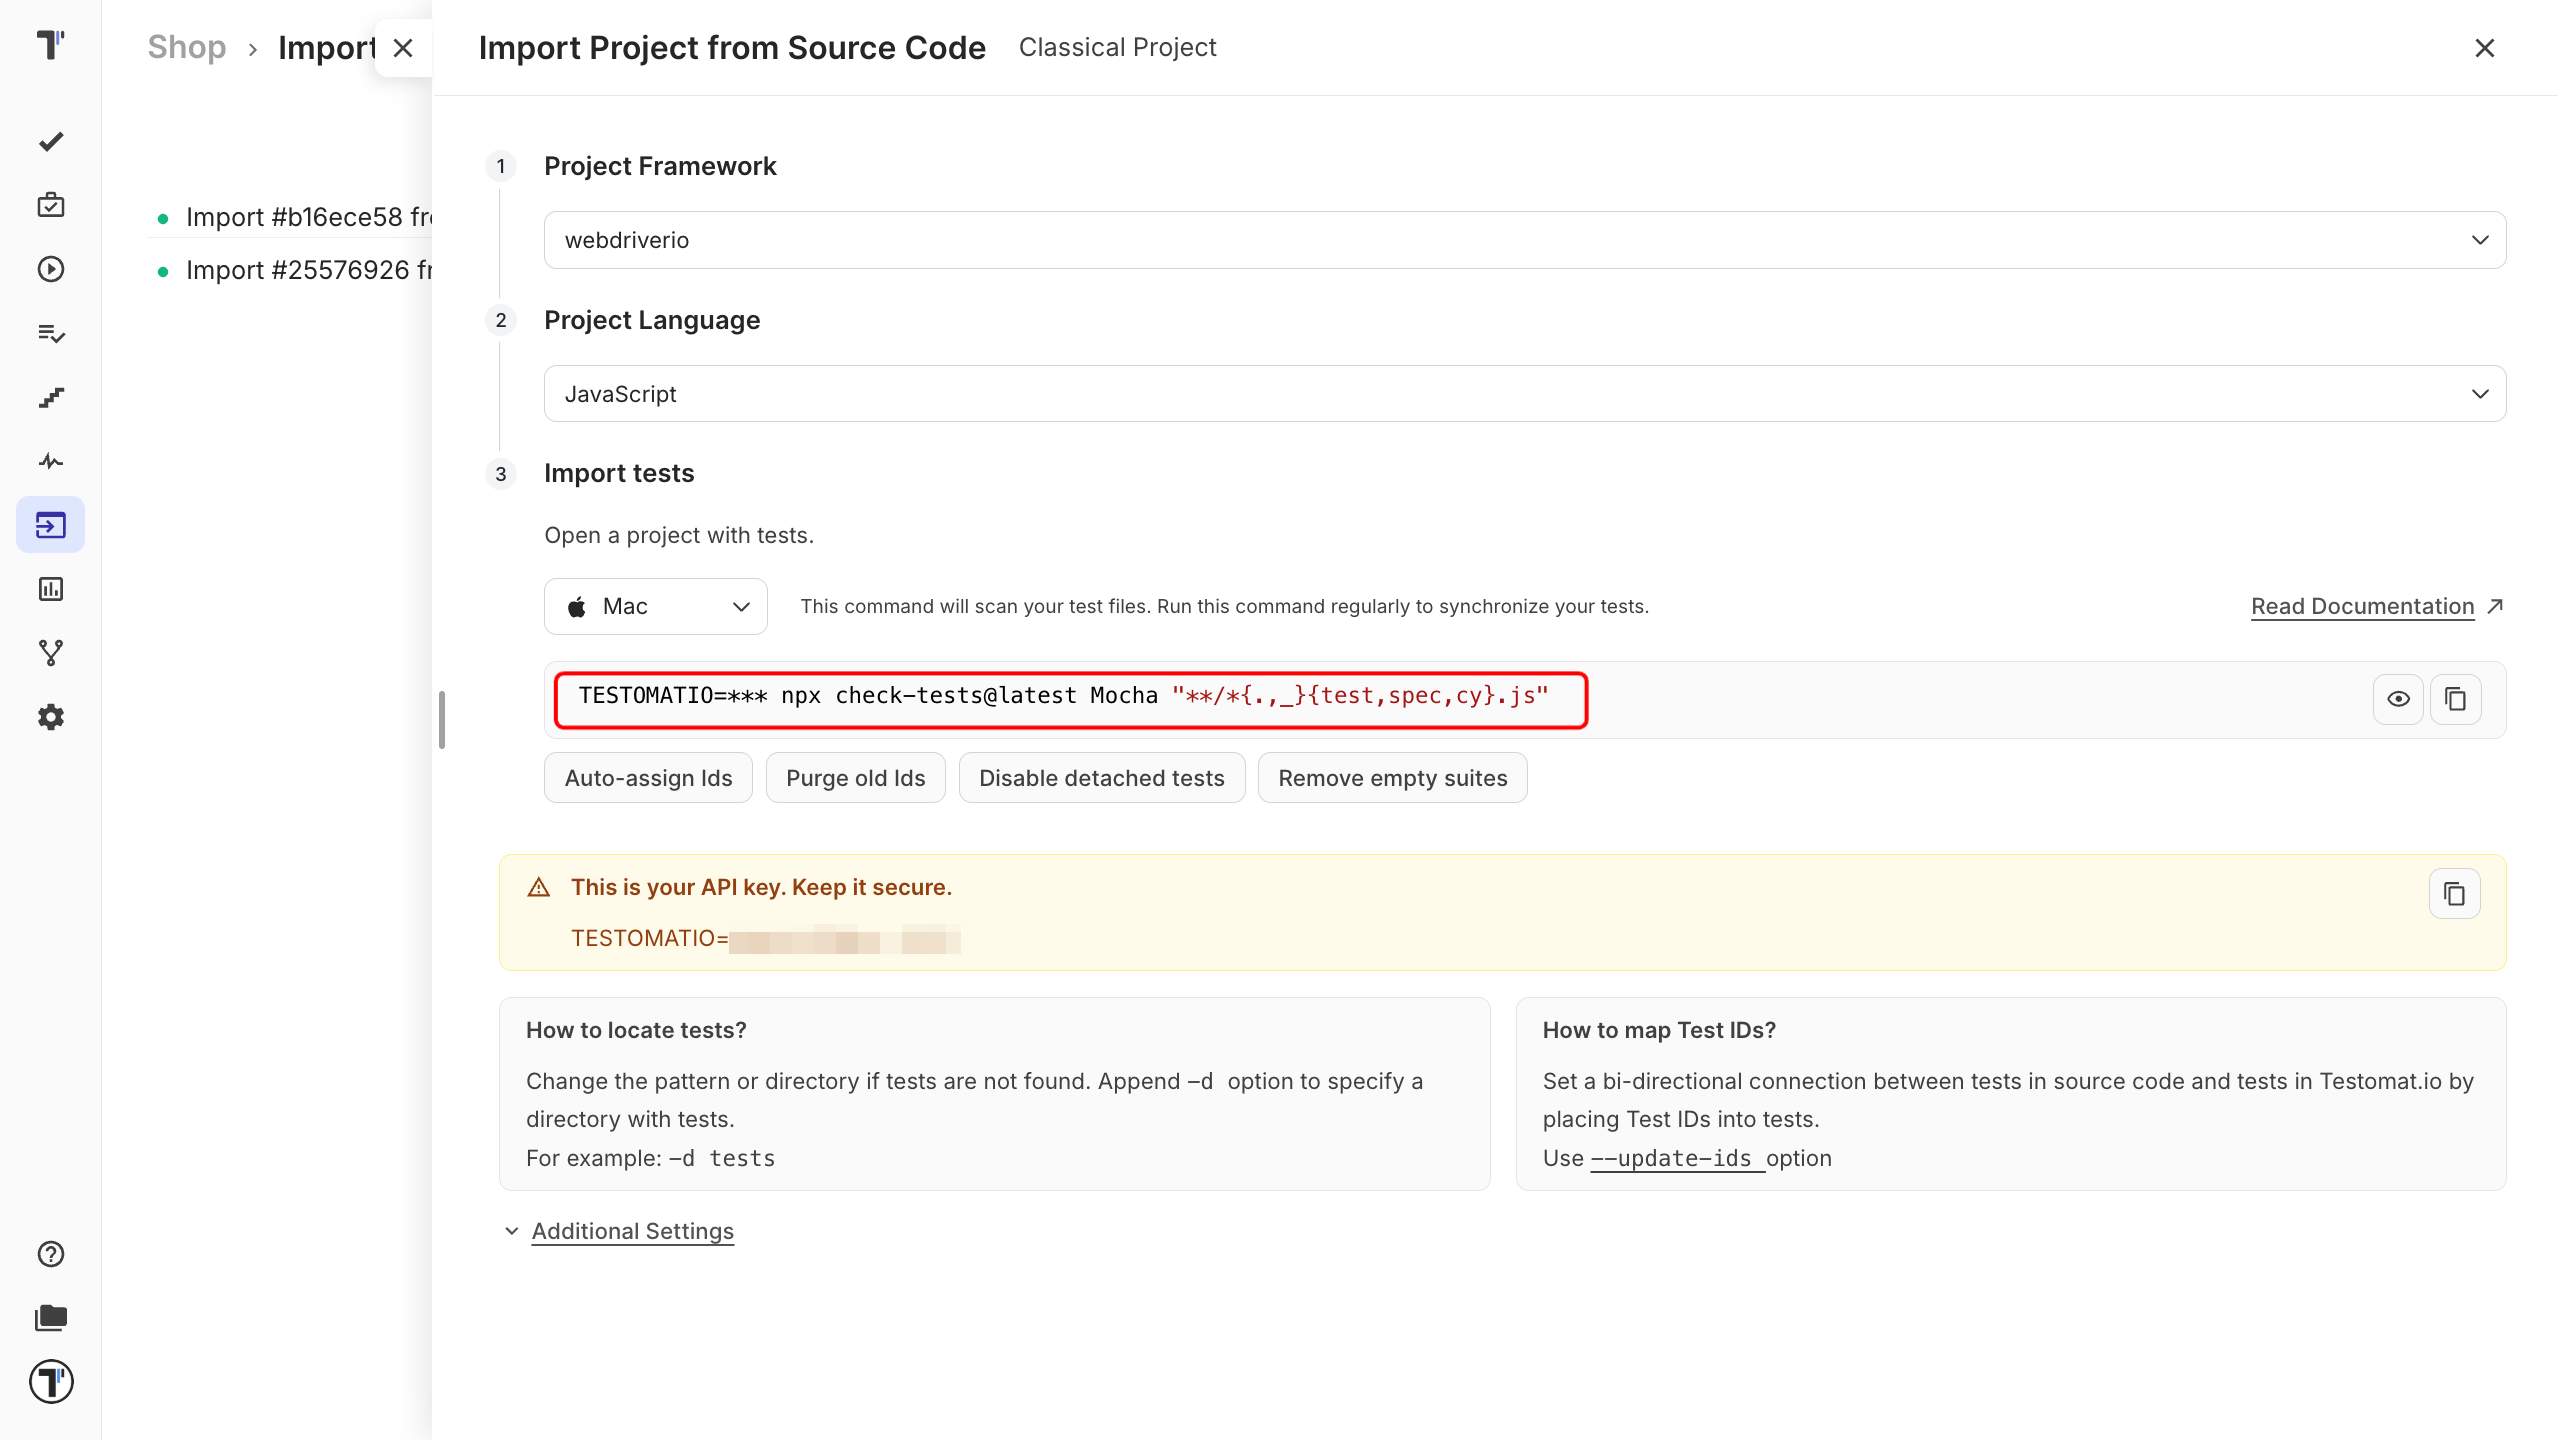
Section titled “Import your tests”Importing brings the tests you already have into Testomat.io, so you can plan, run, and report on them. Everything starts on the Imports page.
- In the Project Framework field, select webdriverio.
- In the Project Language field, select JavaScript or TypeScript.
- Under Import tests, select your operating system.
- Copy the command that appears.
After you’re done with the setup:
- Open a terminal.
- Navigate to your project folder and run the copied command.
- When the terminal prints how many tests it found, the import worked.
- Your tests are now on the Tests page.
Don’t have your own WebDriverIO project yet? Check out our demo project.
For more details, see Import Tests from Source Code.
Import options
Section titled “Import options”You can change how tests are imported:
| Option | Description |
|---|---|
| Auto-assign Ids | Assigns a unique ID to each test. |
| Purge Old Ids | Removes previously set IDs from tests. |
| Disable Detached Tests | Disables tests marked as detached. |
| Prefer Source Code Structure | Keeps your source code structure in the test hierarchy. |
Keep parameter values readable
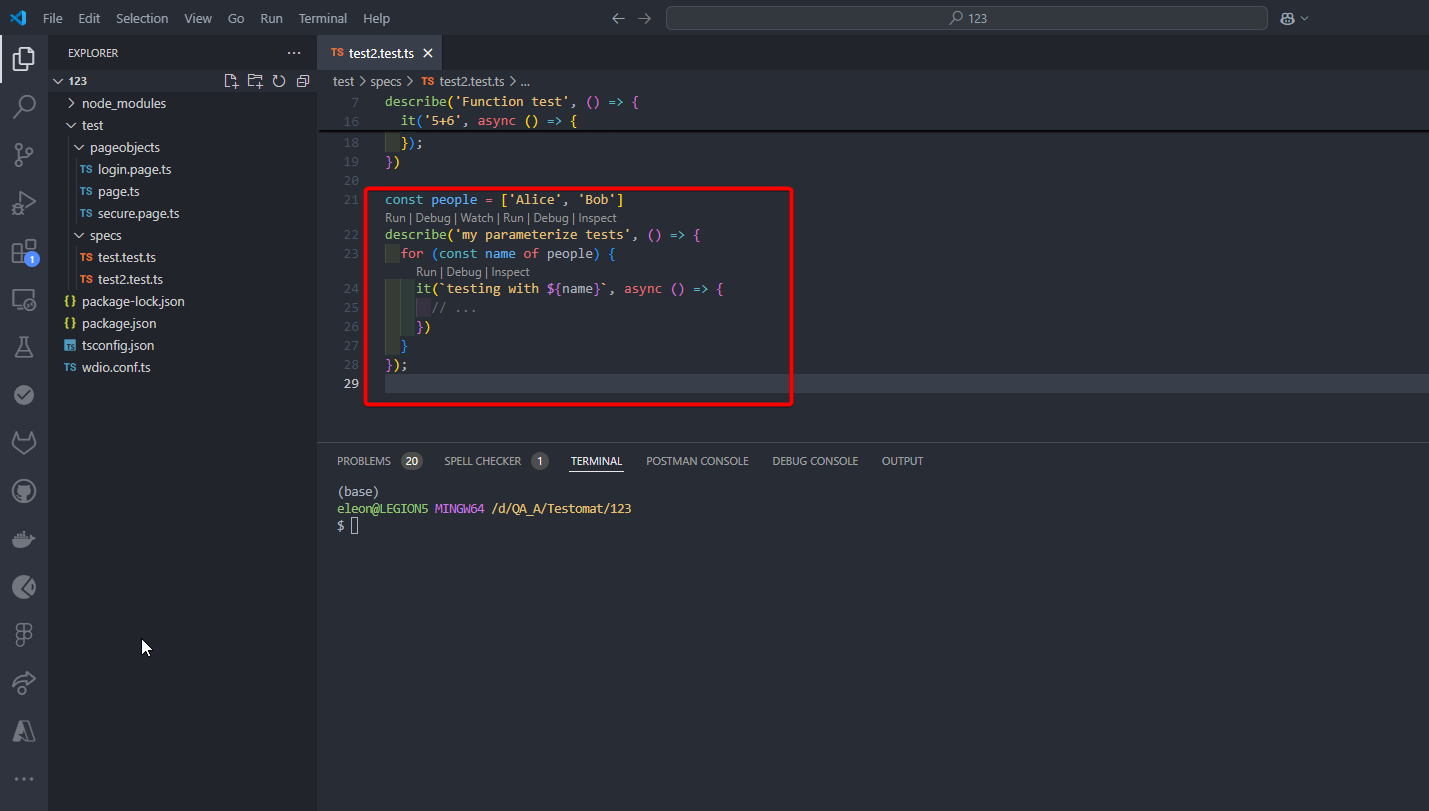
Section titled “Keep parameter values readable”Parametrized tests run the same scenario with different data. To keep those values visible in Testomat.io, write test names with template literals:
const people = ['Alice', 'Bob'];describe('my tests', () => { for (const name of people) { it(`testing with ${name}`, async () => { // ... }); }});The test is imported with the placeholder in its name, and your reports show the real parameter values.
Assign test IDs
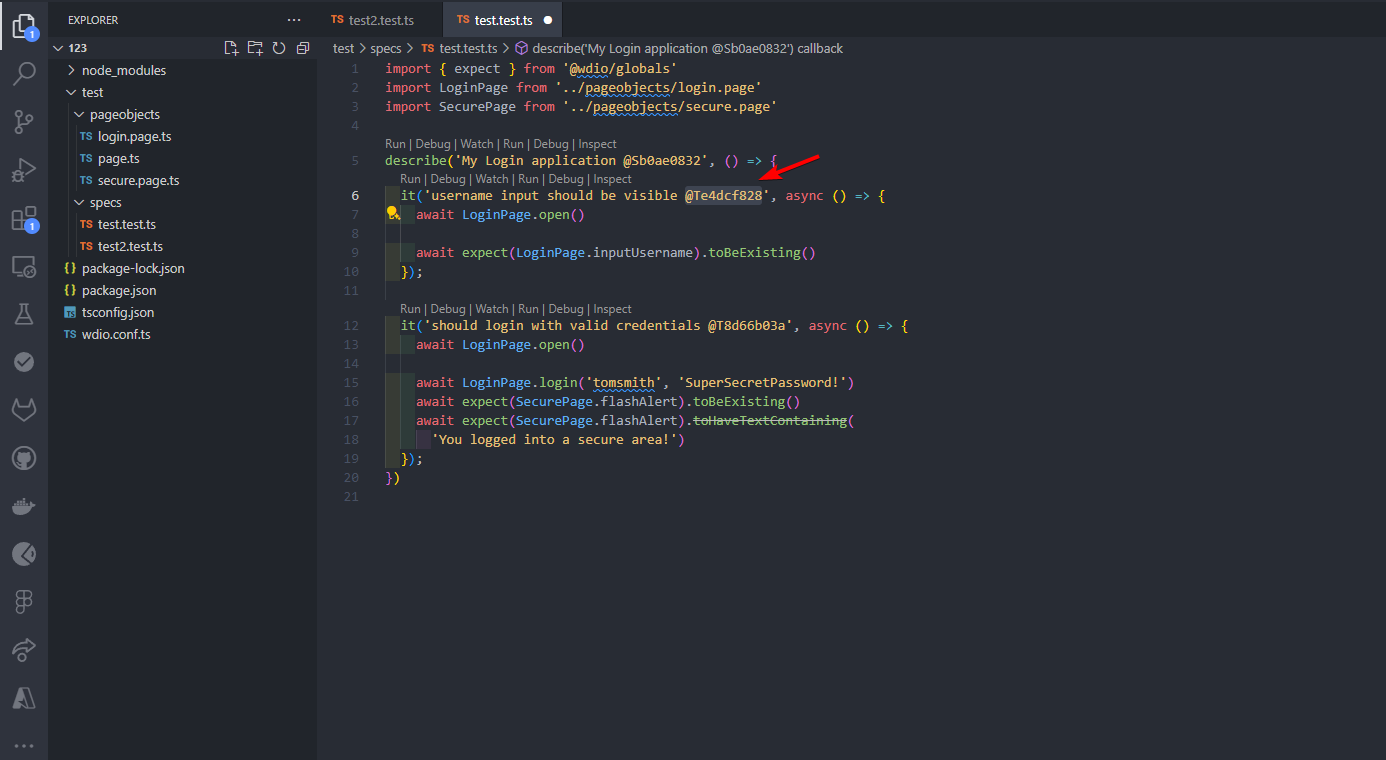
Section titled “Assign test IDs”A test ID links a test in your code to its test case in Testomat.io. Turn on Auto-assign Ids (--update-ids) during import, and Testomat.io writes an ID into each test.
From then on it tracks changes to that test instead of creating duplicates as your project grows.
it('user should be fine @T12345678', () => { it('user should be fine', () => { expect(user).toBe('fine');});Your tests now carry the same IDs in your code and in your project.
Add screenshots to your reports
Section titled “Add screenshots to your reports”Reports show what passed, what failed, and why. WebdriverIO can add screenshots and visual comparisons before the results reach Testomat.io. Pick whichever fits your setup:
- Timeline Reporter gives a visual view of your results, with screenshots that make failures easy to spot.
- @wdio/visual-service compares screenshots against baseline images to catch visual regressions.
- Built-in methods such as browser.saveScreenshot() capture the whole page or a single element.
To capture a screenshot every time a test fails, add this to your config:
afterTest: async function (test, context, { error, result, duration, passed, retries }) { if (error) { await browser.takeScreenshot(); } }Attach artifacts
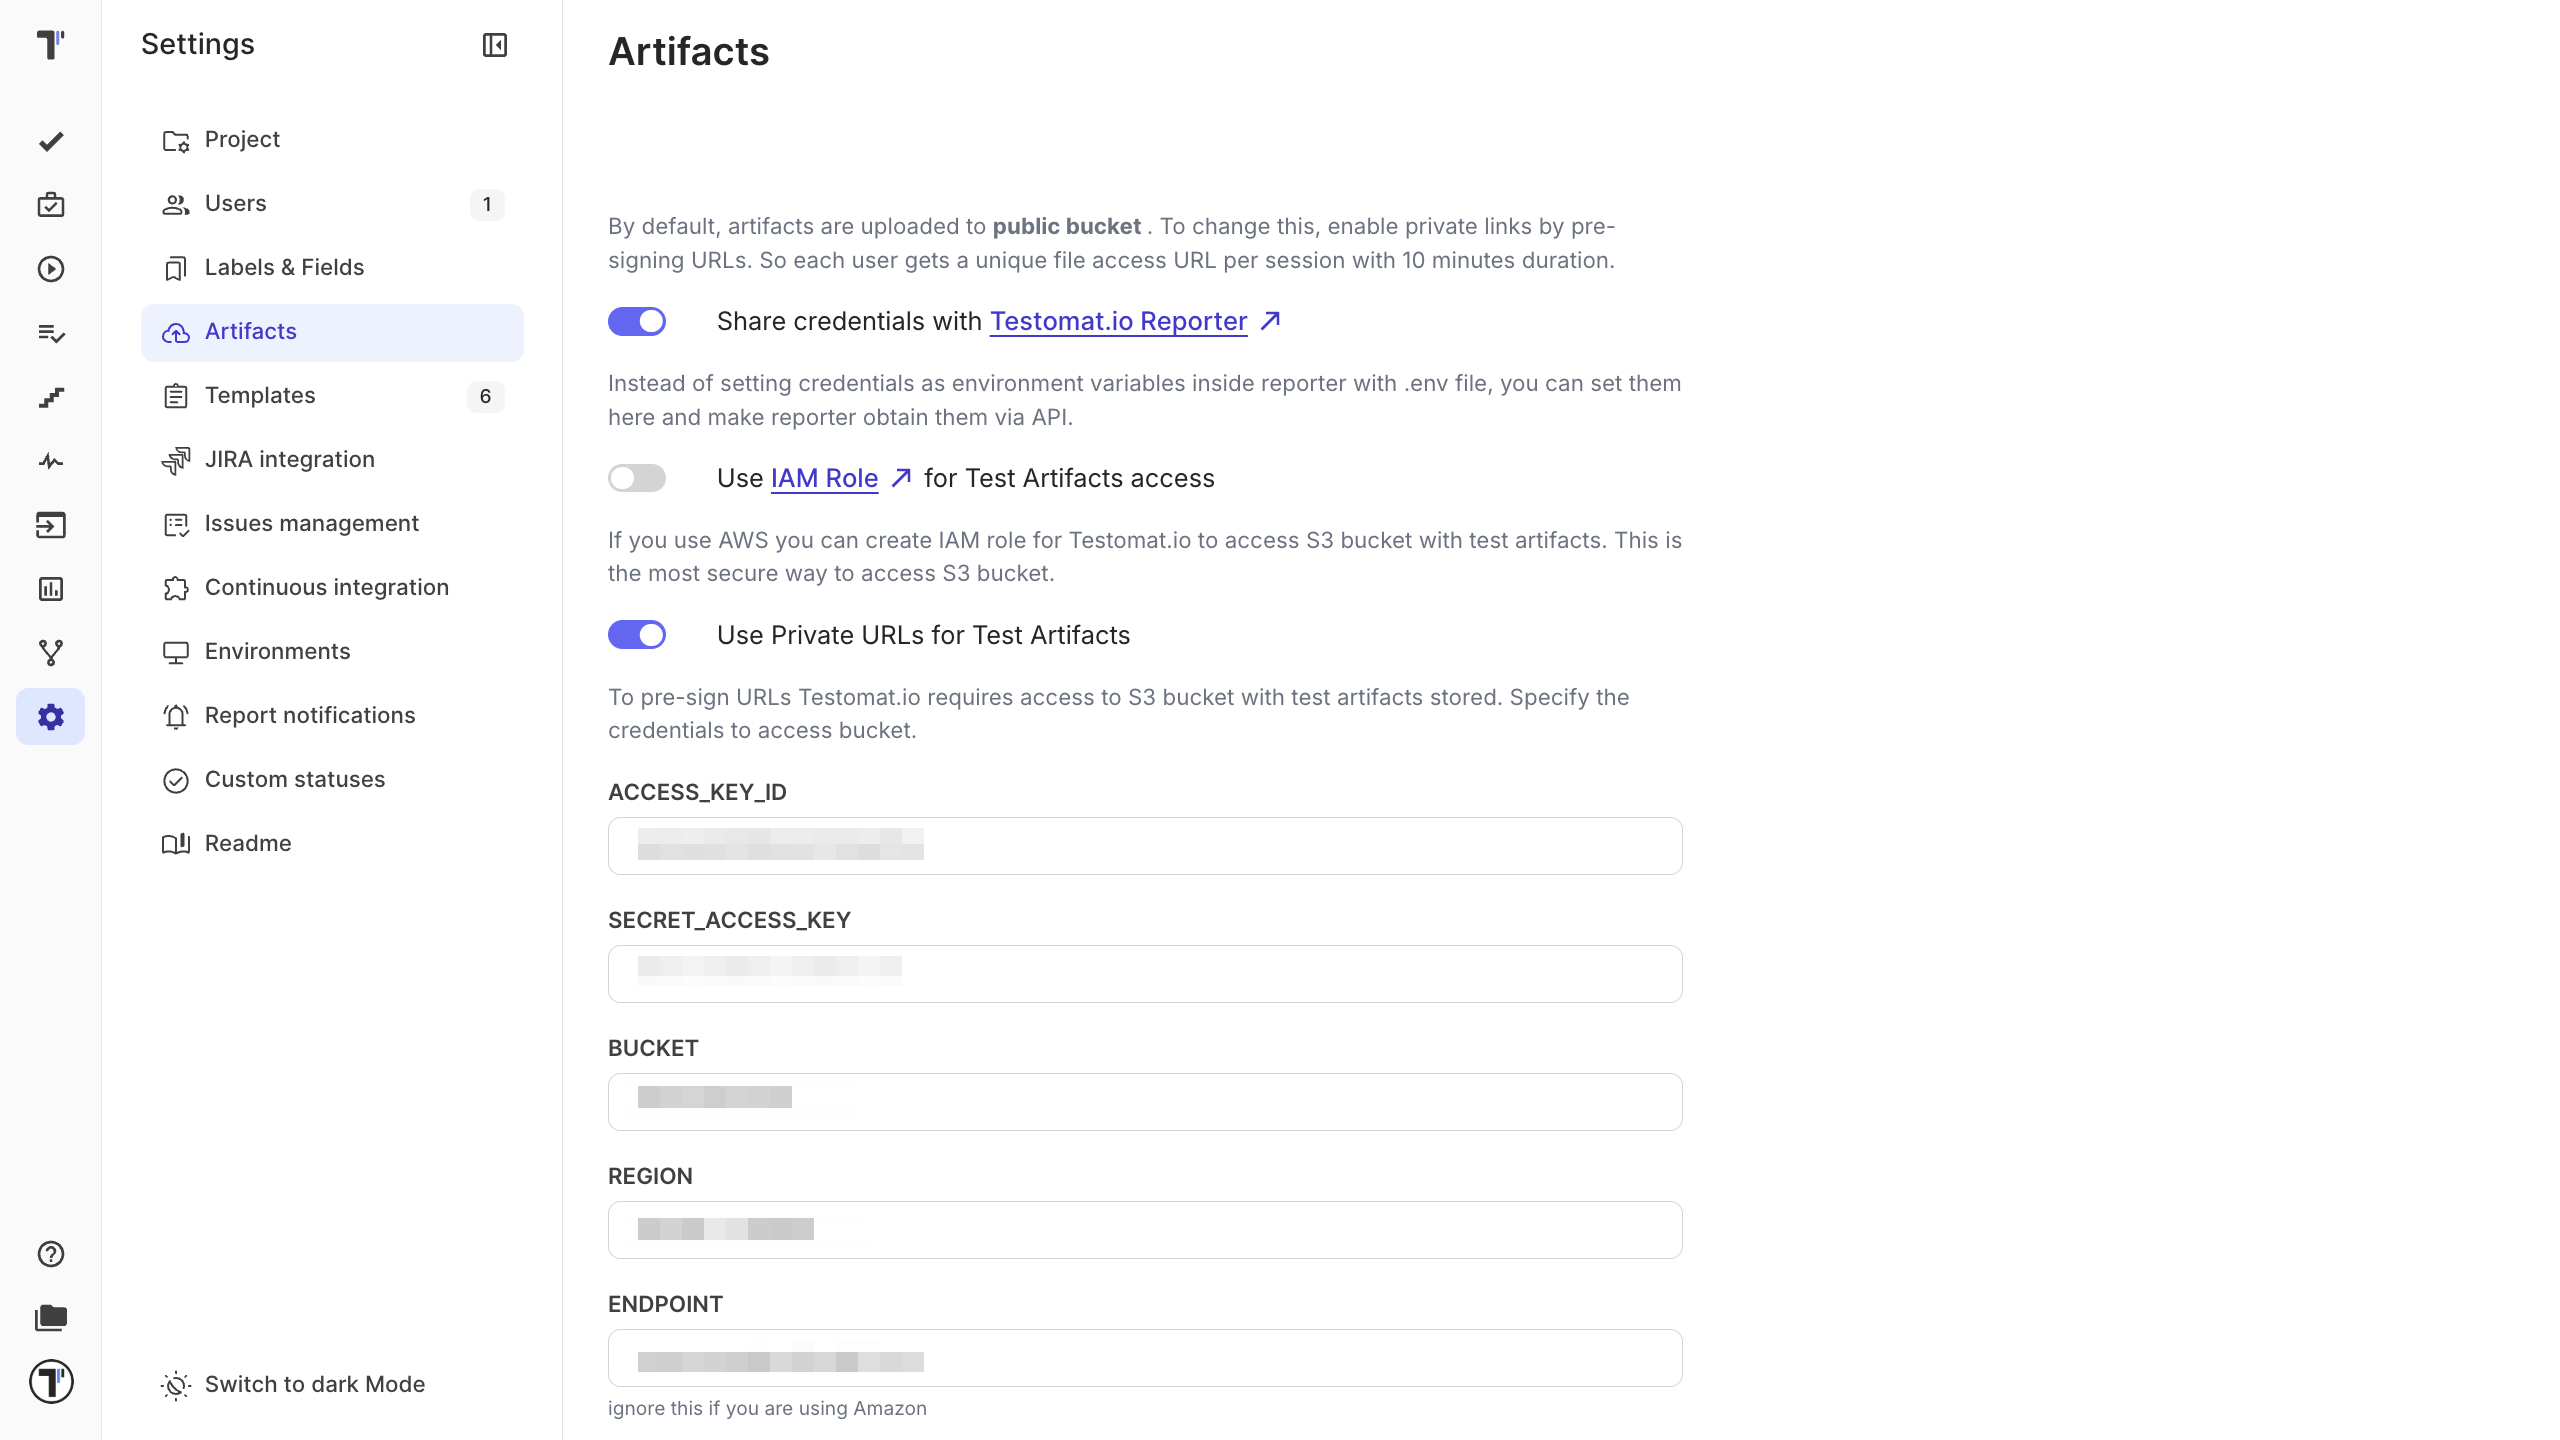
Section titled “Attach artifacts”Screenshots, videos, and logs make a failure much easier to diagnose. The Testomat.io reporter uploads these files to your own S3 bucket and links them to the matching test cases.
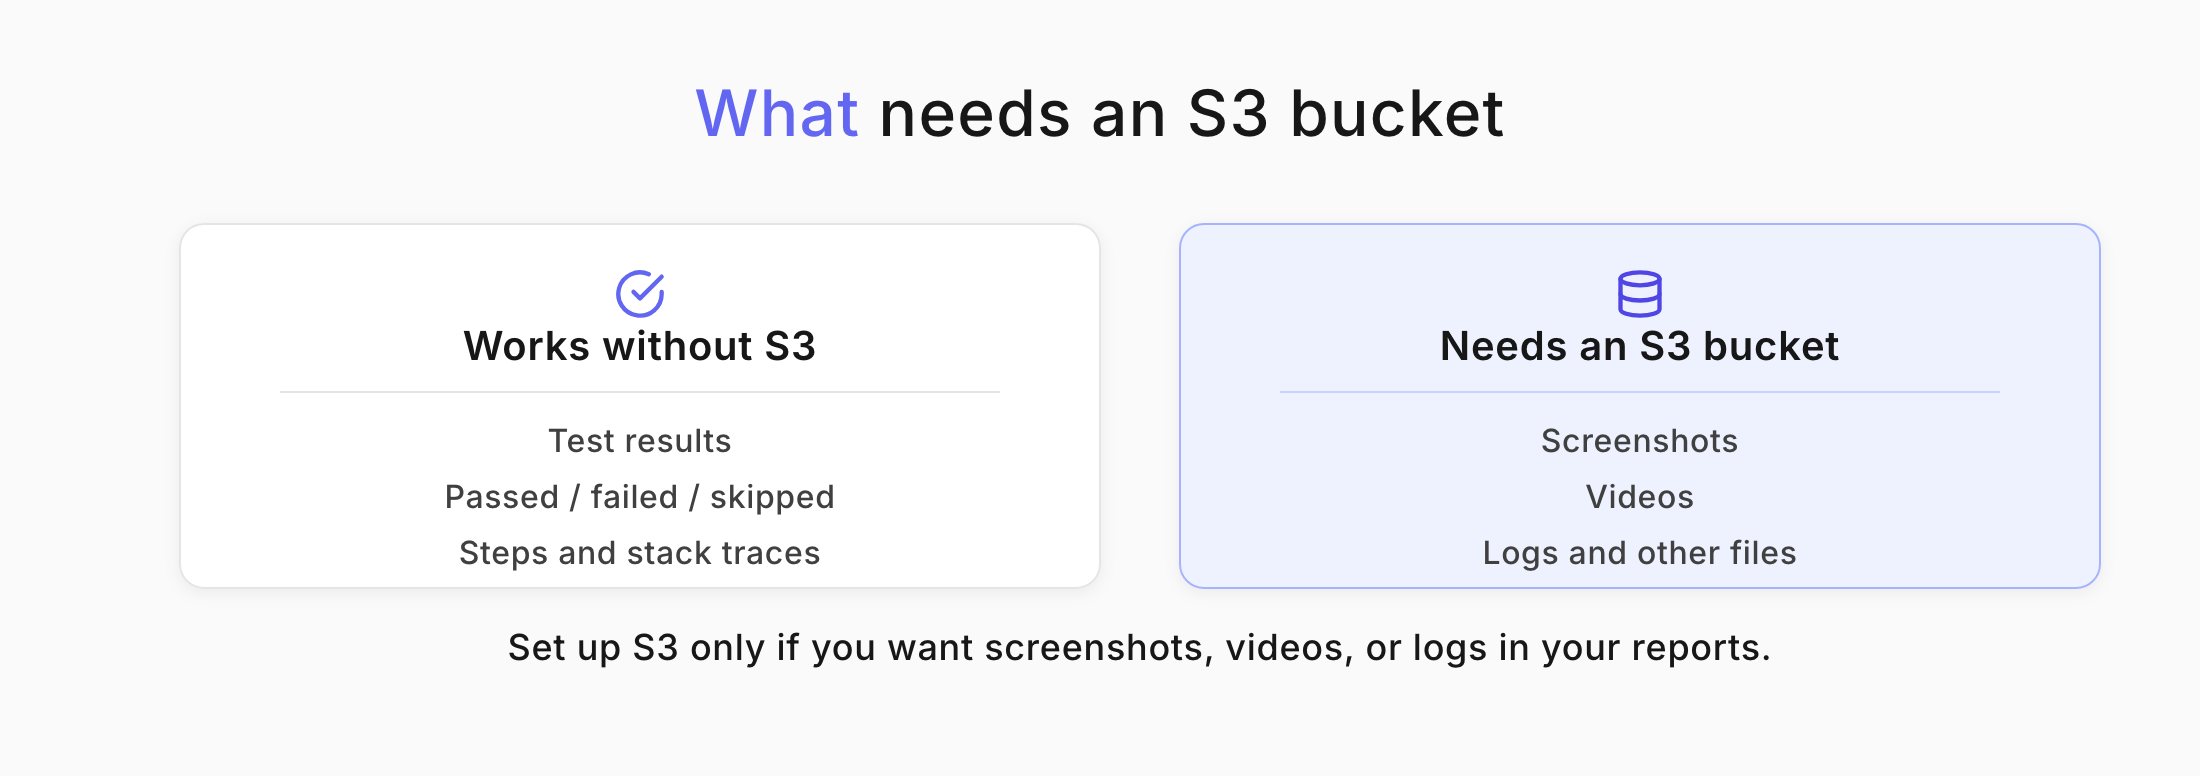
- In WebdriverIO, enable the artifacts you want - for example screenshots and logs.
- Connect your S3 Bucket to Testomat.io.
- Open a test inside a run report to view or download its artifacts.
To attach a screenshot, save it to a file first:
await driver.takeScreenshot().then((image) => { require('fs').writeFileSync('screenshot.png', image, 'base64');});Report parallel runs as one run
Section titled “Report parallel runs as one run”When you split tests across parallel workers, each worker reports its own run by default. To collect them into a single run, give every worker the same title and set TESTOMATIO_SHARED_RUN:
TESTOMATIO_TITLE="Parallel Test Run ${GIT_COMMIT}" TESTOMATIO_SHARED_RUN=1 <actual run command>To extend the shared run timeout (default: 20 minutes), use the TESTOMATIO_SHARED_RUN_TIMEOUT variable.
Example:
TESTOMATIO_SHARED_RUN_TIMEOUT=120 TESTOMATIO_SHARED_RUN=1 <actual run command>The simplest way to run WebdriverIO in parallel is through the Testomat.io CLI, which handles every worker for you:
npx @testomatio/reporter run 'npx wdio [wdio.conf.js](wdio.conf.js)'Next steps
Section titled “Next steps”- For more details, refer to the WebdriverIO guide.
- Run your WebdriverIO tests on every commit — see Continuous Integration.
- Spot unstable and slow tests across your runs in Analytics.
- Get failures explained from your logs with AI-Powered Features.